Sunday, July 17, 2011

Black Bean Stuffed Peppers

http://community.jeroxie.com/groups/cookbook-challenge/
I figured that it was about time that I did a recipe using the slow cooker that I got back in April, especially since I've only used it a few times so far. This Cookbook Challenge theme is hearty, so black bean stuffed peppers from The New Creative Crock-Pot Cookbook by Robin Taylor Swatt sounded perfect. I just happened to find this cookbook in a thrift shop shortly after getting my slow cooker (which is not a Crock-Pot, in case you were wondering, and I'm sure you were).

1 medium onion, finely chopped
1/4 tsp cayenne pepper
1/4 tsp dried oregano
1/4 tsp ground cumin
1/4 tsp chili powder
Two 15 oz. cans black beans, rinsed and drained
5 or 6 green and/or red bell peppers, seeded and cored
1 cup Monterey Jack cheese, grated
1 cup tomato salsa
1/2 cup sour cream

In a medium skillet, saute the onion until golden. Season with the cayenne pepper, oregano, cumin and chili powder. In a medium mixing bowl, mash half of the black beans with the sauteed onions.
Mix in the remaining beans. Spoon the black bean mixture into the bell peppers, and place the bell peppers in the slow cooker.
 Sprinkle the cheese over the peppers. Pour the salsa over the cheese.

Cover; cook on Low 6 to 8 hours (or on High for 3 to 4 hours). Serve each pepper with a dollop of sour cream.

Things that went wrong for me: The original recipe called for 6 tall bell peppers, and I think the ones I got must have been too tall because I only had enough of the bean mixture to fill 5 of them. No big deal.
I cooked these for 3 1/2 hours on High, and I think that I should have cooked them for only 3 hours. I also think that I should have lifted the lid occasionally to let steam escape, because there was a big puddle of liquid in the dish when they were done. They turned out pretty delicate and messy. Here is a sad photo of them inside the slow cooker:
They completely fell apart when moved to a dish.

They were DELICIOUS though!

Saturday, July 2, 2011

Brownie Pudding Cake

http://community.jeroxie.com/groups/cookbook-challenge/
I've been doing too many desserts and baked goods on here, but I couldn't help it this time because the Cookbook Challenge theme is Dessert. I'm a little late once again, but everyone else was too, so I don't feel too bad about it! I had this really great dessert planned, but I couldn't find a key ingredient at the supermarket, so at the last moment I had to change my idea for what to make. This brownie pudding cake was perfect because not only did it sound delicious (It's a brownie cake on top and pudding on the bottom! Of course it sounds delicious!), but every single ingredient was something that I already had on hand.
The recipe is from the 2007 edition of The Good Housekeeping Cookbook.

2 teaspoons instant-coffee powder (optional)
2 tablespoons plus 1 3/4 cups boiling water
1 cup all purpose flour
3/4 cup unsweetened cocoa
1/2 cup granulated sugar
2 teaspoons baking powder
1/4 teaspoon salt
1/2 cup milk
4 tablespoons butter or margarine, melted
1 teaspoon vanilla
1/2 cup packed brown sugar
whipped cream or vanilla ice cream (optional)

I didn't use any instant-coffee powder when I made it, because I can't stand the taste of coffee. People sometimes say that if you add coffee/espresso powder to chocolatey recipes, it doesn't make them taste like coffee, it just gives them a more intense chocolate flavor. I don't know if this is true or not, and I don't care to find out. People that drink coffee are so desensitized to the harsh bitter flavor that they go around saying that their mochas don't taste anything like coffee and that I should try some because I'll like it. And when I try it, all I taste is coffee, and it is horrible.
Anyway, I don't know if the extra two tablespoons of water is necessary if you don't use the coffee powder, but I used it anyway and added it when it told me to just to be on the safe side.

Preheat oven to 350F.
In cup, dissolve coffee powder in 2 tablespoons boiling water, if using.
In large bowl, combine flour, 1/2 cup cocoa, granulated sugar, baking powder, and salt.
In 2-cup measuring cup, combine milk, melted butter, vanilla, and coffee mixture, if using. With wooden spoon, stir milk mixture into flour mixture until just blended.
 Pour into ungreased 8-inch square baking dish.
In small bowl, thoroughly combine brown sugar and remaining 1/4 cup cocoa; sprinkle evenly over batter. Carefully pour remaining 1 3/4 cups boiling water evenly over mixture in baking dish; do not stir. Be careful not to make my mistake and boil the water so long that some of it boils away. Just add some warm or hot water to the boiling water if you do.
Bake 30 minutes (batter will separate into cake and pudding layers). Cool in pan on wire rack 10 minutes. Serve hot with whipped cream, if you like. Makes 8 servings.
You must view this at full size to get the full effect. It looks so good.
 This turned out amazing, of course, and it was so quick and easy to make, too!

Thursday, June 16, 2011

Cardamom Butter Cookies


The current Cookbook Challenge theme is Spice. I love sweet spiced food, with spices such as cinnamon, clove, allspice, and nutmeg. Cardamom is a spice that I only recently started using, so I was excited to try these cardamom butter cookies.
If you go to your average supermarket and grab a bottle of cardamom off the shelf, you may be shocked at the price. This recipe calls for a lot of cardamom (5 1/2 teaspoons total), so you will probably want to see if you can find it cheaper. I'm lucky enough to have a low-price supermarket that carries many items in bulk. They have ground cardamom for about 10 US dollars a pound. I got enough to fill a medium-sized bottle and it only cost me 50 cents! If you don't have any supermarkets nearby that have spices in bulk, try looking in specialty markets, such as ones that would carry Indian or European foods. They may have cardamom in bulk, sold in bags, or in regular bottles at a fraction of the average supermarket price.
This recipe is from The Complete Cookie Book by Elizabeth Wolf Cohen, published in 1994.
It makes about 2 dozen cookies.

2 cups cake flour or all-purpose flour
4 tsp ground cardamom
1/4 tsp salt
3/4 cup (1 1/2 sticks) unsalted butter, softened
1/2 cup sugar
1/2 cup sliced or flaked almonds
 To decorate:
1/3 cup confectioners' sugar
1 1/2 tsp cardamom
sliced or flaked almonds (optional)

Notes: The recipe says to use cake flour, but I used all-purpose because I didn't feel like buying cake flour just for this recipe, and all-purpose flour is called "all-purpose" for a reason! Also, I thought sliced or flaked almonds would be too big for the cookies, so I bought slivered almonds and then put them in a storage bag and ground them up with a rolling pin.


Preheat oven to 375F. Grease 2 large baking sheets. Into a medium bowl, sift together flour, cardamom, and salt.
 In a large bowl with an electric mixer, beat butter until creamy, 30 seconds. Gradually add sugar and continue beating until light and fluffy, 1 to 2 minutes. On low speed, gradually beat in flour mixture until well-blended; then stir in almonds.
 Into a small bowl, sift together confectioners' sugar and cardamom. Using a tablespoon, scoop out dough and roll into 1 1/2-inch balls. Drop balls one at a time into sugar-spice mixture, rolling to coat well.
 Place 1 1/2 inches apart on baking sheets. Dip bottom of a glass into sugar mixture, and flatten cookies to 1/2-inch thick rounds. Press 2 or 3 sliced or flaked almonds onto tops of cookies.
Vader enjoys helping out in the kitchen whenever he can.

 Bake cookies until golden brown, 12 to 14 minutes (12 minutes ended up being a minute or two too long in my horrible electric oven), rotating baking sheets from top to bottom shelf and from front to back halfway through cooking time. Remove baking sheets to wire racks to cool, 2 to 3 minutes. Then, using a thin metal palette knife or spatula, remove cookies to wire racks to cool completely. Store in airtight containers.

Sunday, June 5, 2011

Panna Cotta


 This recipe is for the Cup theme for the Cookbook Challenge, which I'm actually a couple days late for, oops. "Panna cotta" is Italian for "cooked cream", which kind of sounds like it's served hot or warm, but it's actually served cold. You cook cream, milk, and sugar together and then add gelatin and let it set in the refrigerator. As my husband says, it's like cream Jell-O.
It fits into the "cup" theme because you mold it in custard cups or small ramekins, and then turn it out onto a plate and top it with fresh fruit or fruit sauce.
This is a simple vanilla-flavored panna cotta, but it can be really fun to experiment with different flavors.
The recipe is from The Joy of Cooking, the 1997 revised edition. Cookbook snobs tend to turn their nose up at this edition because it's quite different from the original, but it's actually a really amazing, comprehensive cookbook. Also, it's dear to my heart because it was my first cookbook. My mother bought it for me for Christmas in 2000. I do own the original version as well, but it's packed away in a box somewhere, so I'm not sure if panna cotta is in it or not.

2 1/4 tsp (1 envelope) unflavored gelatin
1 1/2 cups heavy cream
1 cup whole milk
1/2 sugar
1 vanilla bean, split lengthwise, or 1 tsp vanilla
1/2 tsp almond extract (optional)
fruit sauce and/or sliced fresh fruit

Lightly oil six 4- to 6-ounce cups or molds.
Pour 3 tablespoons water into a small bowl. Sprinkle unflavored gelatin over the top. Let stand for 5 minutes to soften.
Combine heavy cream, milk, vanilla bean if using, and sugar in a saucepan.

Stirring, bring to a boil over medium high heat. Remove from the heat and extract the vanilla bean. Add the gelatin and stir for 1 minute until completely dissolved. Stir in vanilla if not using the vanilla bean and almond extract.
Pour the mixture into the prepared cups and refrigerate until firmly set, about 3 hours.

Press plastic wrap directly onto the surface of each cream and refrigerate up to 3 days. Unmold onto plates and serve with fruit sauce and/or sliced fresh fruit.

To easily unmold from a custard cup, just stick a butter knife down one side and it will thwop out.
I topped these with the blueberry jam that I made for the last Cookbook Challenge, which for some reason didn't thicken very well and so it turned into more of a blueberry sauce.
I also topped some of them with diced, cooked peaches.

Friday, May 20, 2011

Blueberry Jam


The current Cookbook Challenge theme is Blue. I'm absolutely obsessed with blueberries, so of course I chose a blueberry recipe. They're not quite in season yet (I think that happens next month) so fresh blueberries are really expensive right now, so I found this recipe that works well with fresh or frozen berries. It's from the July 2004 issue of Cooking Light (yes, magazines are allowed in the Cookbook Challenge!), which I recently got at a library that seemed to be getting rid of all of their old issues of the magazine. How could I not take home this issue with a cover photo like this one?

The recipe is originally from the Wildflower Inn in Searsport, Maine.

Note: This jam is stored in the refrigerator, so you don't need to can it!

5 cups fresh or frozen, thawed, blueberries
5 1/4 cups sugar
2/3 cup fresh orange juice (about 3 oranges)
1 tbsp fresh lemon juice
1/4 tsp salt
1 (6-ounce) package liquid fruit pectin (such as CERTO)
Place the blueberries in a large saucepan, and crush with a potato masher.
Add sugar, juices, and salt; stir well to combine.
Let blueberry mixture stand for 30 minutes.
Bring mixture to a boil over medium heat; cook 1 minute, stirring constantly. Remove from heat and add pectin, stirring until well-blended.
Pour jam into jars or air-tight containers.

Cool completely; cover and refrigerate for up to 4 weeks. Yield: 7 cups.
 My jam didn't thicken very well, so I guess I did something wrong, but I'm not sure what. It's really good, though, and I especially enjoyed whipping it together with some mascarpone cheese and filling crepes with the mixture. I plan to make some lemon ice cream soon, and I think it will make a very good topping!

Saturday, May 7, 2011

Savory Biscotti


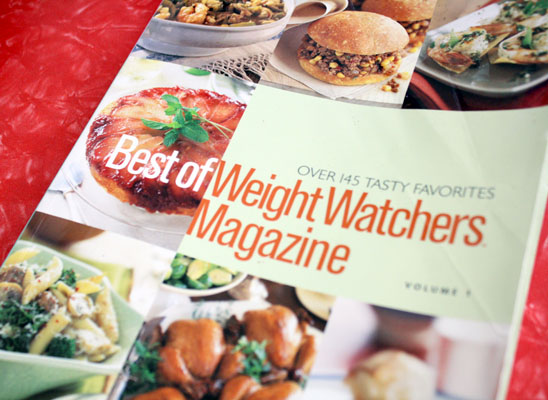
I'm posting this a day late, but the last Cookbook Challenge theme was Crunchy. This one wasn't quite as easy as you would expect! It's hard to find a recipe in a cookbook based on the crunchiness, because they certainly don't list anything in the index under "Crunchy". So I had to think of food that was definitely crunchy, and I remembered this recipe I had seen in the Best of Weight Watchers Magazine cookbook for savory biscotti. They didn't turn out quite as crunchy as I thought they would, but they were yummy!

2 tbsp olive oil
1 tbsp unsalted butter, melted
3 garlic cloves, finely chopped
2 tsp fennel seeds, crushed
1/2 tsp curry powder
2 cups all-purpose flour
2 tbsp yellow cornmeal
1 1/2 tsp baking powder
2 tsp sugar
1 tsp salt
1/4 tsp cayenne
2 egg whites
1 large egg

Note 1: I'm assuming that because this is a Weight Watchers recipe, they replaced 1 egg with 2 egg whites to save calories. So you don't need to use 2 egg whites and 1 egg if it's too much trouble, you can just use 2 whole eggs.
Note 2: Three cloves of garlic may seem like a lot, but the fennel balances it out!
Note 3 (from the cookbook): To crush the fennel seeds, place them on a piece of wax paper, fold over some of the paper to cover, and then press down with a rolling pin.

Preheat the oven to 350F.
Stir the oil, butter, garlic, fennel seeds, and curry powder in a medium microwavable bowl. Microwave on High until aromatic, 10-35 seconds. Let cool.
Whisk the flour, cornmeal, baking powder, sugar, salt, and cayenne in a large bowl.
Whisk the egg whites and egg into the butter mixture; stir into the flour mixture with a wooden spoon until a stiff dough forms.
On a lightly floured surface, roll dough into two 12-inch logs and place 2 inches apart on an ungreased baking sheet.
 Bake until light golden and firm to the touch, about 25 minutes. Let cool completely. With a serrated knife, slice the logs on a slight angle 1/4-inch thick.
 Arrange the slices flat on the baking sheet. Bake 5-6 minutes, turn, and bake until light golden on both sides, 5-6 minutes more.


Friday, April 29, 2011

Tres Leches Cake

"Tres leches" is Spanish for "three milks", and tres leches cake is a Mexican cake that is soaked in three kinds of milk/cream: evaporated milk, sweetened condensed milk, and heavy cream (although some recipes replace the heavy cream with whole milk). If the idea of a slightly soggy cake sounds disgusting to you, just think about the times you've had cake and ice cream together, and how good the cake is when the ice cream melts into it. Tres leches cake is quite similar, except that it's even more moist.

It was very difficult for me to find a recipe for this. I own dozens of cookbooks, but most of them don't have very many Mexican recipes in them. I have one cookbook that is entirely Mexican recipes, but tres leches cake was not included. So I had to search through cookbooks at libraries to find the perfect recipe. I finally found what I was looking for in Fresh Mexico by Marcela Valladolid.

This recipe says to use a 10-inch cake pan with 2-inch sides, and I only have 9-inch cake pans with 1.5-inch sides, so I had some batter left over. Even with leaving out a lot of the batter, the cake expanded more than I thought it would and spilled over a little bit, so I would suggest placing the cake pan on a baking sheet. I would do this even if I had the correct size pan just to be on the safe side.

I also didn't own any platters that had 1-inch high sides, so I just squeezed the cake into a 9x13 baking dish, which worked wonderfully.

Unsalted butter, for the pan
 1 1/2 cups all-purpose flour, plus more for the pan
1 tbsp baking powder
1 tsp ground cinnamon
4 large eggs, separated
1 1/2 cups sugar
1/2 cup milk
One 14-oz. can sweetened condensed milk
One 12-oz. can evaporated milk
1 cup heavy cream
1 tbsp orange liqueur, such as Grand Marnier (I replaced this with about 1/2 tsp orange extract)

Preheat the oven to 350F. Butter and flour a 10-inch cake pan with 2-inch-high sides, and then line the bottom with parchment paper. Butter the paper.
Mix the flour, baking powder, and cinnamon in a medium bowl.
Using an electric mixer, whip the egg whites until frothy. With the mixer running, gradually add the sugar and beat until stiff peaks form. (I could NOT get this to stiffen, even after completely starting over, probably due to so much sugar being added. I decided to not worry about it, especially since it would collapse anyway after adding the other ingredients.)
Beat in the egg yolks, one at a time, blending well after each addition. Add the flour mixture in three additions, alternating with the whole milk in two additions.

Pour the batter into the prepared pan and bake for 30 minutes, or until a tester inserted into the center comes out clean. Let the cake cool slightly in the pan; then invert it onto a platter with 1-inch-high sides.
Pierce the top of the warm cake all over with a thick skewer.
Mix the sweetened condensed milk, evaporated milk, heavy cream, and orange liqueur (or orange extract), and pour over the cake.

Cover and refrigerate until cold, about 3 hours, or overnight.
Serve as is or top with whipped cream and/or fruit, if desired.
If you have never tried tres leches cake before, prepare to fall in love.